


How to Pass the Lifeguard Written and Skills Test—Even If You’re Starting From Zero (No Fluff Guide)
Passing the lifeguard written and skills test isn’t just about knowledge—it’s about focus, repetition, and practical performance.
Becoming a certified lifeguard isnt just about swimming wellits about understanding safety procedures, mastering rescue techniques, and passing both a written and practical skills test. If youre starting from zero, dont panic. This step-by-step guide breaks it down into manageable tasks so you can walk into your exam with confidence.
? 1. Understand the Test Format Before You Study
Written Test:
-
Multiple-choice format (usually 3050 questions)
-
Topics: CPR, AED use, spinal injury management, rescue protocols, and safety regulations.
Skills Test:
-
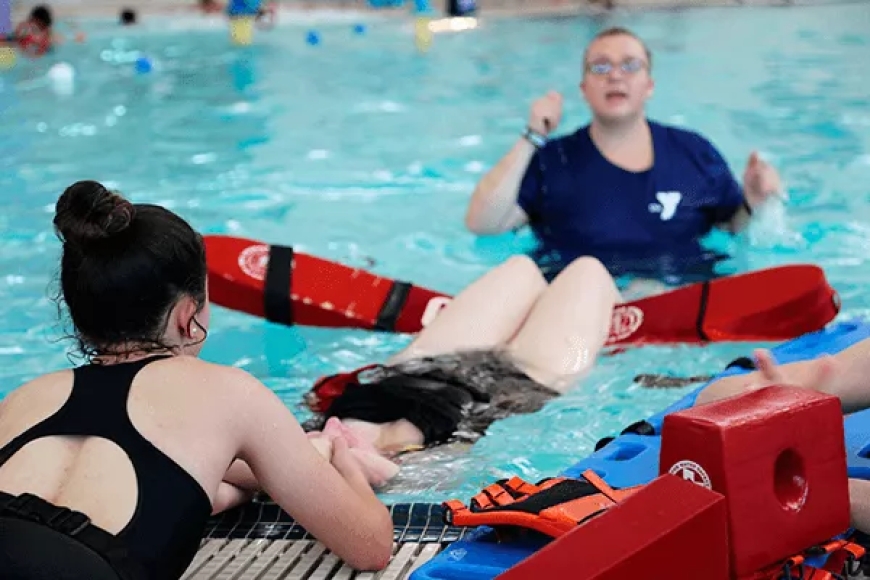
Physical demonstrations like water rescues, backboarding, spinal management, and timed swims.
-
Usually involves in-water scenarios where youre evaluated on technique and speed.
? Why It Matters: Knowing what to expect helps you prepare strategically. Dont treat all topics equallyfocus on the high-weight sections.
? 2. Start With Basic First Aid and CPR Concepts
Before diving into lifeguard-specific material, build a solid foundation in general emergency care.
Focus on:
-
Adult, child, and infant CPR techniques
-
AED use and pad placement
-
Conscious and unconscious choking procedures
-
Basic wound care and bleeding control
? Pro Tip: Watch certified first aid videos or use official practice apps to simulate real-life scenarios.
? 3. Learn Lifeguard-Specific Terminology and Protocols
Youll encounter terms like compact jump, rescue tube, stride entry, or active vs. passive drowning. These arent common phrases if you're new.
Study These Areas:
-
Types of water entries and when to use them
-
Recognizing distress signals in swimmers
-
How to conduct a safe approach and rescue
-
The chain of drowning survival
-
In-water ventilation techniques
? Pro Tip: Flashcards can help reinforce these quickly. You can make your own or use apps like Quizlet.
? 4. Master the Physical Requirements Gradually
You dont need to be an Olympic swimmer, but you must meet minimum requirements.
Typical Physical Skills Test Requirements:
-
Swim 300 yards continuously (freestyle and breaststroke)
-
Tread water for 2 minutes without hands
-
Complete a timed event (retrieve a brick from deep water within 1 minute 40 seconds)
Training Tips:
-
Practice your swimming in short intervals, gradually increasing distance
-
Build upper-body and core strength with dry-land training
-
Focus on breath control and endurance
? Pro Tip: Dont ignore treading waterit seems easy but is often underestimated.
? 5. Use Scenario-Based Practice to Build Real-World Skills
Reading isnt enoughyou need to think like a lifeguard.
Try This:
-
Visualize real-life rescue scenarios
-
Role-play with a partner or mentor
-
Time your skills like spinal board placement or victim extraction
-
Simulate emergency response while under slight pressure
? Pro Tip: Many exams include group-based skill testing. Practicing with others will boost your coordination and communication.
? 6. Take Practice Tests (Again and Again)
Practice tests do more than test knowledgethey teach you how to think under pressure.
What to Focus On:
-
Prioritize understanding over memorization
-
Review incorrect answers and revisit those topics
-
Time yourself to simulate real exam conditions
? Pro Tip: Break down your score by section. If youre weak in CPR, reinforce that until it becomes second nature.
? 7. Follow a Structured Study Plan (Even a Simple One)
Cramming wont work hereyoure preparing for real-life emergencies.
Example 7-Day Study Plan for Beginners:
| Day | Focus Area |
|---|---|
| 1 | CPR + AED Basics |
| 2 | Rescue Techniques + Entries |
| 3 | Distressed vs. Drowning Swimmers |
| 4 | Spinal Injury Protocols |
| 5 | Practice Skills + Timed Events |
| 6 | Take 2 Practice Tests |
| 7 | Review Mistakes + Light Practice |
? Pro Tip: Even 4560 minutes a day is enough if done consistently.
? 8. Ask for Feedback From Instructors or Peers
If youre enrolled in a course, dont just passively attend.
How Feedback Helps:
-
Corrects your posture and body mechanics
-
Teaches you how to conserve energy during rescues
-
Builds communication and leadership under stress
? Pro Tip: Record yourself performing rescue drills to analyze your performance.
? 9. Stay Calm and Confident on Test Day
Being nervous is normalbut dont let it control you.
Tips for the Day Of:
-
Eat a balanced meal and stay hydrated
-
Bring your gear: swimsuit, towel, goggles (if allowed), and ID
-
Arrive early to stretch and get comfortable
-
Listen closely to instructionsdont rush
? Pro Tip: Confidence is part of the evaluation. Even if you hesitate, recover quickly and stay focused.
? 10. Know What Happens If You Dont Pass
Sometimes things dont go as planned. Most programs allow one free retake or partial retest.
What to Do:
-
Ask for a breakdown of what you missed
-
Get extra practice on those skills
-
Retake only after practicingnot immediately
? Pro Tip: Failing a test doesnt mean youre not cut out for lifeguarding. Its a skill-based career, and growth comes through repetition.
Final Thoughts
Passing the lifeguard written and skills test isnt just about knowledgeits about focus, repetition, and practical performance. Even if you're starting from zero, the key is structure: know what to study, practice regularly, and simulate real scenarios. Stay calm, stay committed, and walk into that test knowing youre ready to save lives.